The Streamer's Secret Weapon: Why Affordable DIY Soundproofing Matters
In the competitive world of live streaming, audio quality isn't just a nice-to-have; it's a non-negotiable. Whether you're a seasoned gaming influencer, a burgeoning podcast host, or a passionate content creator, distracting background noise can instantly break immersion, frustrate your audience, and even hinder your growth. The sounds of barking dogs, noisy neighbors, traffic outside, or even family members moving about can quickly turn your professional broadcast into an amateur hour.
Many streamers might assume that effective soundproofing requires a substantial investment or extensive home renovations. The good news? That's simply not true! You don't need a professional recording studio to significantly improve your audio environment. This article will guide you through a wealth of affordable, DIY-friendly
soundproofing materials for streaming room setups, allowing you to create a quieter, more professional space without breaking the bank. By understanding the basics of how sound travels and applying some clever, low-cost solutions, you can dramatically enhance your stream quality and focus on what truly matters: your content.
Understanding the Core Concepts: Absorption vs. Blocking
Before diving into specific materials, it's crucial to grasp the two fundamental principles of sound management: sound absorption and sound blocking. Both play vital roles in creating an optimal streaming environment, though they address different aspects of noise.
*
Sound Absorption: This technique focuses on reducing echoes and reverberation *within* your room. Soft, porous materials absorb sound waves, preventing them from bouncing around and creating a muddy, hollow, or echoey sound in your microphone. This is vital for clear, crisp vocal audio. Think of it like dampening the room's natural 'ring.'
*
Sound Blocking (or Soundproofing): This aims to prevent sound from *entering* or *leaving* your room. It typically involves adding mass and sealing gaps to create a barrier that sound waves struggle to penetrate. This is essential for keeping external distractions out of your stream and ensuring privacy if you're talking loudly or broadcasting sensitive content.
Many affordable DIY
soundproofing materials for streaming room setups will offer a combination of both, though some excel more in one area. Understanding this distinction will help you choose the right materials for your specific noise challenges. For a deeper dive into these concepts, explore our guide on
Essential Soundproofing Materials for Your Streaming Room.
Affordable Walls & Ceilings: Your First Line of Defense
Your walls and ceiling are significant surfaces where sound can bounce around or penetrate. Addressing them effectively is a cornerstone of DIY soundproofing.
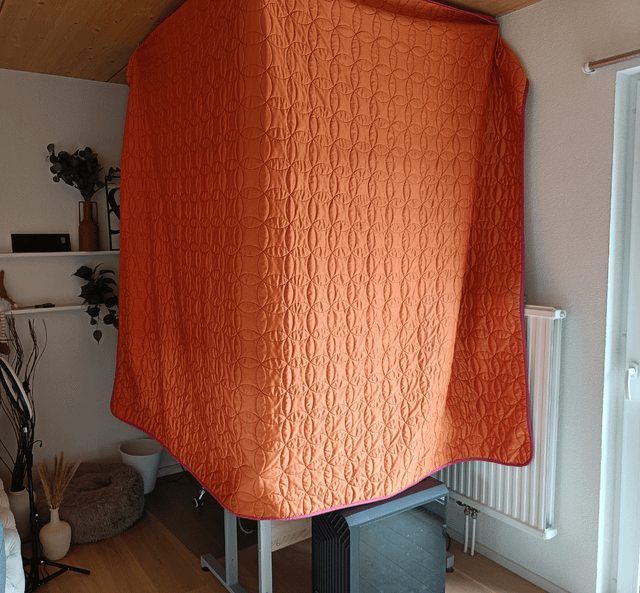
Heavy Blankets, Quilts, and Moving Pads
One of the most immediate and cost-effective ways to improve both sound absorption and a degree of sound blocking is by utilizing heavy textiles.
- Thick Moving Blankets: These industrial-grade blankets are designed to protect items during transit and are surprisingly effective at absorbing sound. They are thick, dense, and often feature quilted patterns that enhance their acoustic properties. You can hang them directly on walls using grommets and hooks, or drape them over makeshift frames.
- Quilts and Comforters: Repurpose old quilts or thick comforters. The batting inside provides excellent absorption. Similar to moving blankets, hang them strategically on walls, especially behind your microphone setup or on the wall opposite your main sound source.
- Heavy Drapes or Curtains: While often associated with windows, heavy, floor-to-ceiling drapes can be hung on walls to create an absorbent surface. Look for blackout or thermal curtains for added density.
These materials are excellent for dampening internal echoes and can offer a modest improvement in blocking external noise, especially if layered.
DIY Acoustic Panels
For a more polished and highly effective absorption solution, consider making your own acoustic panels. This is a classic DIY project that yields professional results.
- Materials: You'll need rigid insulation (like Roxul Rockboard or mineral wool – *ensure proper handling with protective gear*), a simple wooden frame (made from 1x4s), and an acoustically transparent fabric (like burlap or speaker cloth) to wrap it.
- Construction: Assemble the frame, cut the insulation to fit snugly, place it within the frame, and then stretch and staple the fabric tightly around the entire assembly.
- Placement: Place these panels at key reflection points – typically on the walls to the sides of your streaming desk, behind your monitor, and on any large, bare wall surfaces.
DIY acoustic panels are fantastic for refining your in-room sound, making your voice sound clearer and more professional on stream.
Mass-Loaded Vinyl (MLV)
If you're looking for more serious sound *blocking* for your walls (or even ceilings), Mass-Loaded Vinyl (MLV) is a game-changer. It's a dense, flexible material, often used in professional soundproofing.
- Application: MLV adds significant mass without taking up much space. For a DIY approach, you can hang it behind other wall coverings (like drywall if you're undertaking a larger project), or even directly on existing walls, covering it with fabric or other aesthetic solutions.
- Benefit: Its high density makes it excellent at stopping sound waves, making it one of the most effective soundproofing materials for streaming room walls when noise transfer is a major concern. It's a bit more of an investment than blankets but offers superior blocking capabilities.
Sealing the Leaks: Doors, Windows, and Gaps
Doors and windows are often the weakest links in any room's soundproofing chain. Even the thickest walls won't help if sound can easily seep through gaps and thinner materials.
Taming Troublesome Doors
Hollow-core doors are notorious for letting sound pass right through. While replacing them with solid-core doors is the ideal (but less affordable DIY) solution, there are many things you can do.
- Weatherstripping and Door Sweeps: This is a must. Small gaps around the door frame can let in a surprising amount of noise. Adhesive-backed weatherstripping (foam, rubber, or silicone) applied along the door jamb's perimeter creates a tight seal when the door is closed. For the bottom gap, install a door sweep or draft stopper. For an even better seal, consider an automatic door bottom that drops a gasket when the door closes.
- Acoustic Blankets/Curtains for Doors: Hanging a heavy moving blanket or a dedicated acoustic curtain over the inside of your door can significantly reduce sound transmission. You can use a tension rod or hooks to hang it, making sure it covers the entire door surface.
- Add Mass to the Door Itself: While not fully DIY in terms of replacing the door, you can add mass. Sheets of MLV can be glued to the door panel (though this might impact aesthetics), or even thick layers of cardboard can offer marginal improvements.
Window Wisdom for Quieter Streams
Windows, especially older single-pane varieties, are another common entry point for external noise.
- Heavy Drapes and Thermal Curtains: Just like for walls, thick, heavy, floor-to-ceiling curtains are your best friend. Layering them, perhaps with blackout or thermal lining, adds density and absorption. Make sure they extend beyond the window frame to minimize sound leakage.
- DIY Window Plugs: For serious, temporary sound blocking, consider making a window plug. Cut a piece of rigid foam insulation (or even plywood) to fit perfectly inside your window frame. You can cover it with fabric for aesthetics. These plugs can be inserted when streaming and removed afterward. They provide significant mass and an airtight seal.
- Acoustic Film: Some acoustic films can be applied to window panes to add a slight degree of sound dampening, though their effectiveness is generally less than heavy drapes or plugs.
For more detailed strategies on fortifying these common weak points, check out
Quiet Your Stream: Soundproofing Materials for Walls & Doors.
General Gap Sealing
Don't underestimate tiny cracks! Sound, like water, will find the path of least resistance.
- Caulk: Use acoustic caulk (or even standard latex caulk) to seal any visible cracks or gaps around window frames, door frames, or where walls meet the ceiling.
- Expanding Foam Sealant: For larger, more stubborn gaps, expanding foam can be an effective, though sometimes messy, solution.
Grounding the Racket: Floors and Floor Coverings
Your floor can be a major source of noise, both from impacts (footsteps, dropped items) and from sound waves reflecting off its hard surface.
Thick Rugs and Carpets
This is perhaps the simplest and most visually appealing soundproofing solution for floors.
- Area Rugs: Laying down thick, plush area rugs, especially in high-traffic areas or under your streaming desk, will absorb significant sound. The thicker the rug, the better its absorption properties.
- Carpet Remnants: You can often find affordable carpet remnants from flooring stores that can be cut to size. Layering these can provide even more sound dampening.
- Carpet Underlayment: For maximum impact, place a thick felt or rubber underlayment beneath your rug. This adds mass and cushioning, enhancing both absorption and impact noise reduction.
Soft floor coverings prevent sound from bouncing off hard surfaces, contributing to a warmer, clearer sound profile for your microphone. They also dampen footfalls, which is crucial if you move around during your stream or have others walking nearby.
Anti-Vibration Pads for Equipment
While not strictly about floor covering, consider anti-vibration pads for any noisy equipment that sits on your floor, like a PC tower. These pads isolate vibrations, preventing them from transferring to the floor and potentially being picked up by your sensitive microphone.
Conclusion: Start Small, Stream Big
Achieving a quieter, more professional streaming environment doesn't require a Hollywood budget or an army of contractors. By strategically applying affordable, DIY
soundproofing materials for streaming room setups, you can make a monumental difference. Start with the easiest and most impactful changes: sealing gaps around doors and windows, hanging heavy textiles on walls, and introducing thick rugs. From there, you can gradually implement more advanced DIY projects like custom acoustic panels or MLV. Every small step you take to reduce noise will contribute to a clearer, more engaging stream, allowing your content – and your voice – to shine through with professional clarity. Embrace these techniques, and get ready to elevate your streaming game!